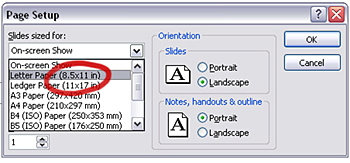
2. Page Setup > Letter...
HOW TO WRITE A HIGH-QUALITY PDF FOR PRINTING
FROM MICROSOFT
POWERPOINT
PC USERS: [15 Steps]
1 2
3 4 5 6
7 8 9 10
11 12 13 14 15
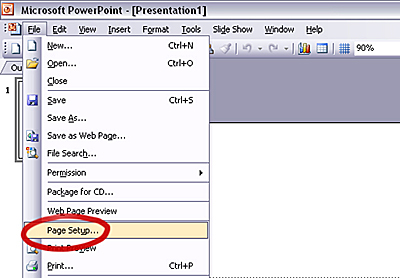
1. File > Page Setup...
 [
top ]
[
top ]
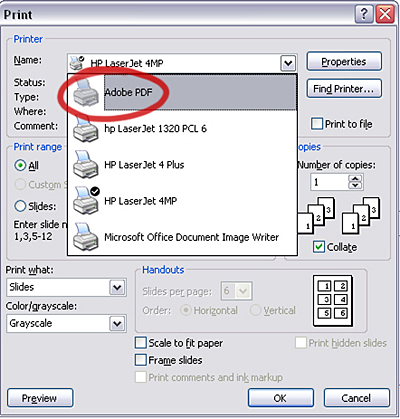
3. File > Print...
 [
top ]
[
top ]
4. Select Adobe PDF as your printer at top of menu
 [ top ]
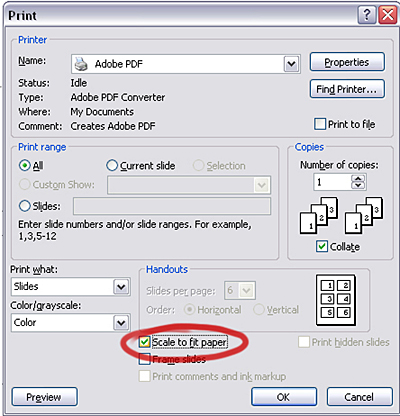
5. Scale to fit paper [this will scale your poster down
proportionally to fit the page size] - Trust me :)
 [ top ]
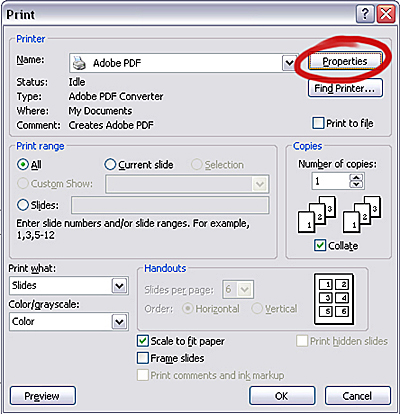
6. Print > Properties...
 [ top ]
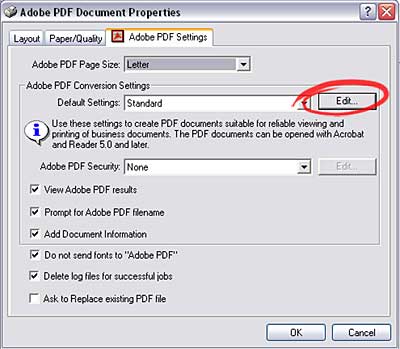
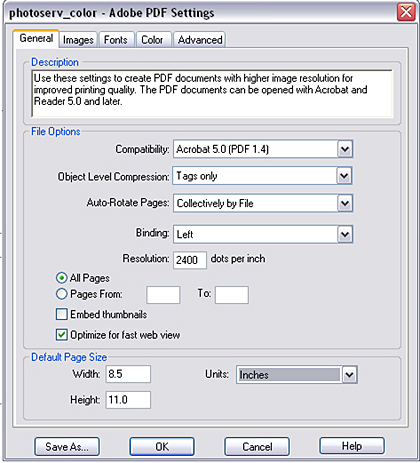
7. Adobe PDF Settings > Edit...
8. Make your General Settings window look like this:
 [ top ]
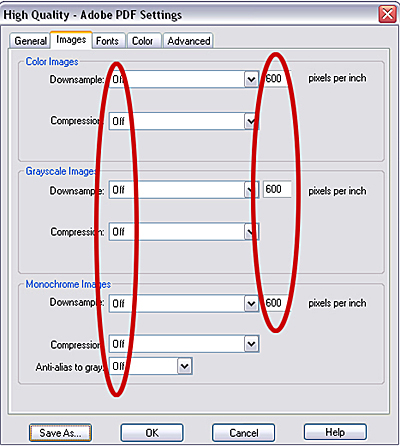
9. Make your Images Window look like this... [NO
Downsampling, NO Compression, 600dpi]:
 [ top ]
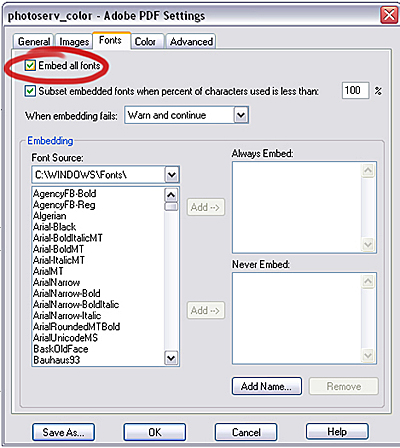
10. Select (check) "Embed All Fonts"...
 [ top ]
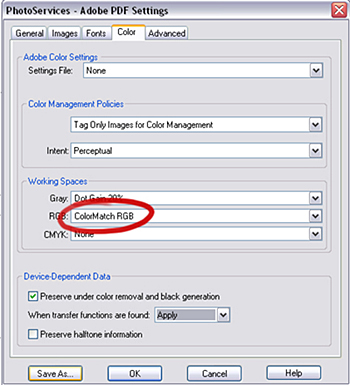
11. Make your Color Settings window look like this
[RGB: ColorMatch RGB]...
 [ top ]
12. Save the
Preset! (1) [Save As...] (2) use the filename"PhotoServices.joboptions"
(3) Click Save
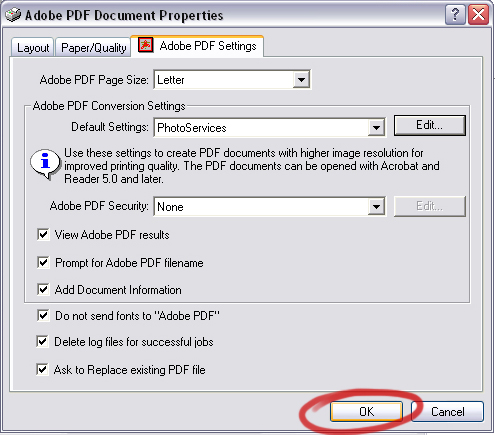
13. Your PDF
Settings window should now look like the one BELOW:
If they do, then Click OK
If your window does NOT look like the one
below, return to the top of this HowTo Guide and
re-check your steps
 [ top ]
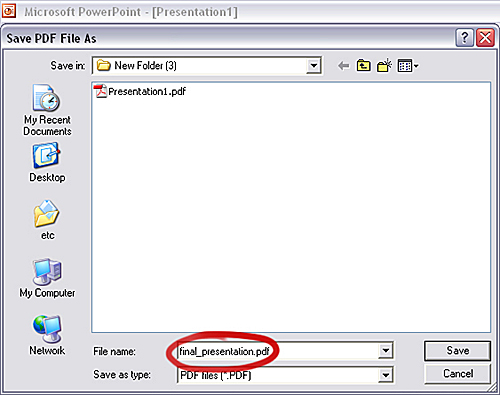
14. Save your
Poster PDF... [I recommend saving the file
inside the same folder that your original Powerpoint (.ppt) file
resides]
15. You have just successfully written a PDF that will provide crisp text and high-quality imagery on a large-format print.
What
Remains to be done:
1. Open the PDF in Adobe Acrobat to double-check
formatting, image quality, general look of poster file
2. Once file is verified for correctness email the file to: photoquestions@id.ucsb.edu.
3. Include the final dimensions of the poster in the
email (i.e. 36"x48", please leave 1/4" white border")
We will check the file for quality, compatibility, and printability and
respond back letting you know your project is in good hands.
[back to top]